This Tutorial was written by Kerry on the 28th July 2008
Any similarity to any other tutorial is purely coincidental
This tutorial was written in psp9 but should work in other versions.
Supplies
Tube of choice i used the gorgeous work of Elias Chatzoudis You can purchase hes tubes HERE
Pirate Punk freebie scrap kit here which you can get HERE
Template 6 By Missy HERE you may have to go through the older posts to find it.
Supplies HERE
Lets Begin!
Open Missy's Template and duplicate it (shift+D)
Close the original
Delete the top layer of the template. Activate the background layer, then go to
Image - Canvas size - 700x700 pixels
You may need to flood fill the layer.
Open a paper from the scrap kit resize by 20%
Back to Missy's template, activate the Bracket shape layer and go to
Selections - Select all - Selections - Float - Selections - Defloat
Copy and paste the paper you choose as a new layer, then go to
Selections - Invert
and hit delete on your keyboard
Select None.
Delete the original bracket shape layer.
Using different papers or colours repeat these steps for the Rectangle layers and circle layer.
Add a dropshadow of your choice to these layers.
Open the pucked ribbon from the supplies, colorize if needed. place near the bottom of the bracket shape - make sure the ribbon is UNDER the rectangle layers.
Duplicate the ribbon layer and move one ribbon near the top of the bracket shape.
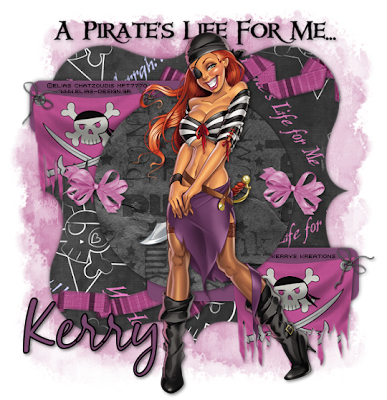
See my tag for reference.
Using the free hand selection tool - set point to point feather 0 anti alias checked - select around any of the ribbon that is hanging over the edge and hit delete on your keyboard
Activate a Ribbon Layer
Using the Burn Brush
With these settings
Size 5 - Hardness 58 - Step 100 - Density 100 - Thickness 100 - Rotation 0 - Opcacity 30
Start clicking the end of the ribbon, you will notice the end will start to look darker, this will give the ribbon a "wrapped" look.
Do this on both ribbons.
Add a dropshadow of your choice.
Open the Bow supplied, copy and paste as new layer resize and colorize if needed.
Position where you think looks best.
Add a drop shadow.
Add any other embellishments from the kit - i used one of the ripped flags - resize as needed.
I placed the over the rectangles.
Open the word art supplied
Copy and paste as new layer - resize by 80%
Position where you think looks best.
Add a drop shadow of choice.
Hide the background layer and then merge visable the remaining layers.
Copy and paste your tubes as new layer
Add dropshadow of your choice.
Activate background layer then add a new raster layer.
Flood fill with a color or paper of choice and apply the mask that is supplied.
Merge group, i resized the mask layer by 80%.
Merge all layers visable.
Add your copyrights and your name.
Save as png/jpeg
and your done.
I hope you enjoyed doing this tut
Feel free to email me your results - i would LOVE to see them.
Kerry
~ ♥ ~


No comments:
Post a Comment