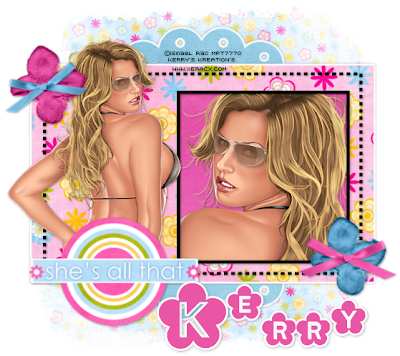
She's All That
Supplies
Tube of choice, i used the gorgeous work of Ismael Rac which you can buy HERE
Doxie Moxie Scrap kit which you can buy from HERE
Template By Kimmy, you can download this from her blog HERE
Eye Candy 4000 Gradient Glow
Font and Mask of choice.
Let's Begin
Open Kimmy's template and on your keyboard hold down shift and D to duplicate it - close the original.
Then go to image - canvas size - 700x700.
Delete the first layer (the copyright layer)
Activate the scallop backing layer and go to Selections - Select all - float - defloat
Open a paper from the kit you are using and resize as needed. Then copy and paste the paper onto the canvas with the template - Selections - Invert and hit delete on your keyboard
Deselect
then delete the original scallop backing layer.
Go to eye candy 4000 - Gradient Glow, on the basic tab use these settings
Glow Width - 3
Soft Corners - 25
Overall Opacity - 100
Then on the colors tab use the preset called fat.
Add a dropshadow of your choice.
Repeat this step for the rectange layer using a different paper from the kit you are using.
Activate the square layer and go to Selections - Select All - Float - Defloat
Add a new Raster Layer and flood fill with black or a color of your choice.
Then
Selections - Modify - Contract by 5 pixels, then on your keyboard hit delete.
Deselect and delete the original square layer.
Grab your magic wand tool and click inside the square frame we just made, then go to Selections - Modify - Expand by 3 pixels
Choose another paper from your kit and copy and paste as new layer - then go to Selections - Invert and hit delete on your keyboard.
Dont Deselect yet.
Open the tube you are going to be using, and copy and paste as new layer onto your canvas, postion inside the frame. Once you are happy hit delete on your keyboard.
Deselect and add a drop shadow of choice to your tube and frame layer.
Activate the Dotted Frame layer
Selections - Select All - Float - Defloat
Add a new raster layer and flood fill with a color of choice.
Add a drop shadow
Add another tube to the left of the one in the frame - see my tag for reference.
Add any embellishments from the kit you are using and position where you think looks best.
Hide the background layer and merge visable.
Open another paper from the kit you are using, resize if needed, make sure this layer is below the merged layer and apply your mask - Merge your mask layer as a group.
Resize your mask layer if needed.
Make sure the background layer is hidden and merge visable again.
Crop and resize as needed.
Add any copyrights and credits.
Add your name and save as a jpeg/png
And your done!
Hope you enjoyed this tutorial - i would love to see your results!


